Introduction
Amazon Route 53 is a scalable and highly available Domain Name System (DNS) web service designed to route end-user requests to internet applications. It integrates seamlessly with other AWS services and offers robust features for DNS management. In this blog, we’ll explore the fundamentals of Amazon Route 53, with a special focus on Hosted Zones. We’ll also walk through a practical demo on how to set up and manage Hosted Zones in Route 53.
Understanding Amazon Route 53
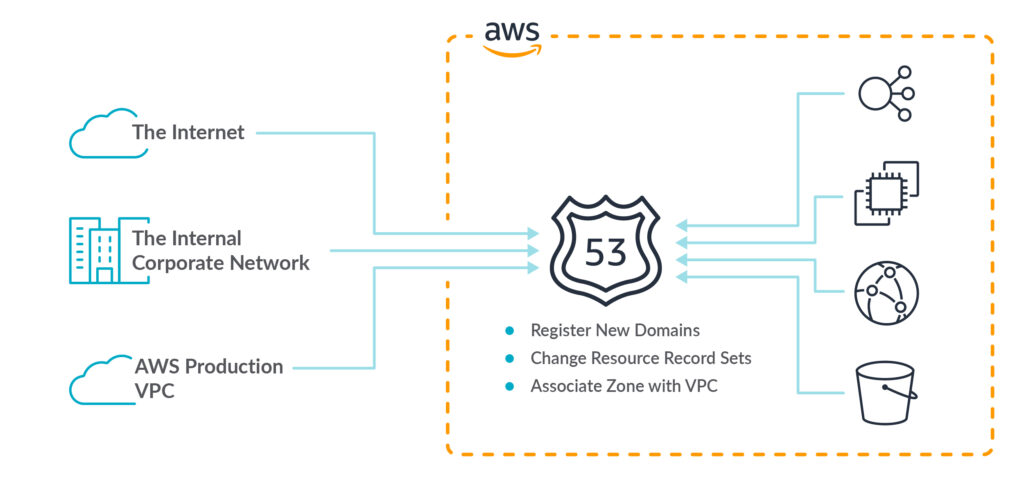
Amazon Route 53 is named after the TCP/UDP port 53, the standard port for DNS server requests. It provides several functionalities, including:
- Domain Registration: Register new domain names directly through AWS.
- DNS Routing: Route traffic to AWS resources such as EC2 instances, Elastic Load Balancers, and S3 buckets.
- Health Checking and Monitoring: Automatically route traffic away from unhealthy resources.
- Traffic Flow Management: Create sophisticated routing policies to handle different traffic needs.

Key Features of Route 53
- Highly Available and Scalable: Route 53 is designed to handle large volumes of DNS queries without any performance degradation.
- Seamless Integration with AWS Services: Easily integrate Route 53 with other AWS services to streamline your infrastructure management.
- Global DNS Network: Route 53 uses a global network of DNS servers to ensure low latency and high availability.
- Advanced Traffic Routing Policies: Utilize simple, weighted, latency-based, failover, and geolocation routing policies.
What are Hosted Zones?
A Hosted Zone in Route 53 is a container for managing DNS records for a specific domain or subdomain. It is equivalent to a traditional DNS zone file but offers more flexibility and control. There are two types of Hosted Zones:
- Public Hosted Zone: Used to manage public DNS records that are accessible over the internet.
- Private Hosted Zone: Used to manage DNS records that are only accessible within a VPC (Virtual Private Cloud).
Route 53 Hosted Zones Demo
In this demo, we’ll create a Public Hosted Zone for a domain and add DNS records to it.
Step 1: Create a Hosted Zone
- Login to the AWS Management Console.
- Navigate to the Route 53 dashboard.
- Click on Hosted Zones in the left-hand menu.
- Click the Create Hosted Zone button.
- Enter your domain name (e.g., example.com) and select Public Hosted Zone.
- Click Create.
Step 2: Add DNS Records
- In the Hosted Zone dashboard, click on the newly created hosted zone.
- Click Create Record Set.
- Enter the details for your DNS record:
- Name: Leave it blank for the root domain or enter a subdomain (e.g., www).
- Type: Select the record type (e.g., A, CNAME).
- Value: Enter the IP address or domain name the record should point to.
- Click Create.
Step 3: Update Domain Registrar with Route 53 Name Servers
- Navigate to the Hosted Zone details and note the NS (Name Server) records.
- Login to your domain registrar and update the domain’s name server settings with the NS records provided by Route 53.
Step 4: Verify DNS Settings
- Use tools like nslookup or dig to verify the DNS records are correctly set up.
- Test your domain in a web browser to ensure it resolves to the correct IP address.
Conclusion
Amazon Route 53 simplifies DNS management with powerful features and seamless AWS integration. By using Hosted Zones, you can efficiently manage DNS records for your domains. The demo provided shows the basic steps to set up and manage a Hosted Zone, giving you the foundation to further explore and utilize Route 53’s capabilities.
